Correction works best when it is followed by better habits. Read about preventing swirls and scratches, washing safely, and choosing ceramic protection after polishing.
What paint correction means
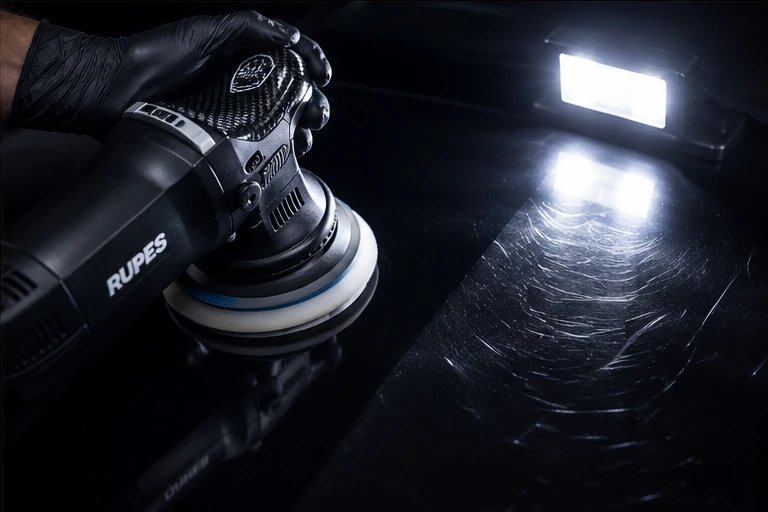
Paint correction is the controlled machine-polishing process used to improve the appearance of automotive paint by reducing swirls, haze, oxidation, marring, holograms, water-spot staining, and light scratches where safe. It is not just “buffing.” Done properly, correction is inspection, testing, controlled abrasion, refinement, and protection.
The goal is to improve gloss, clarity, and depth while preserving as much clear coat as possible. The best correction is not always the most aggressive correction. The right approach depends on the paint condition, paint thickness, vehicle value, customer expectations, and how much improvement can be achieved safely.
What paint correction actually removes
Most modern vehicles have a clear coat above the color layer. Many visible defects sit in that clear coat. Paint correction uses abrasives in compounds and polishes to level or refine a very small amount of the clear coat around those defects so the surface reflects light more evenly.
- Swirl marks from poor washing and drying.
- Light towel marring and haze.
- Light oxidation or dullness.
- Holograms from poor rotary polishing.
- Some water-spot staining if it has not etched too deeply.
- Light scratches that are safely within the clear coat.
- Paint transfer and scuffs where the damage is on top of the paint.
What paint correction does not fix
Correction has limits. It cannot replace missing paint or repair damage that goes through the clear coat. It cannot fix dents, rock chips, peeling clear coat, failed paint, cracked paint, or deep scratches that catch heavily with a fingernail and go beyond safe correction depth.
A professional correction plan should be honest about what can improve, what can remain, and what should not be chased because preserving clear coat is more important than removing every visible mark.
Clear coat basics and why paint thickness matters
The clear coat is the sacrificial layer being polished. Every aggressive correction removes some clear. That is why paint thickness, edge safety, previous polishing history, and panel condition matter. Thin areas, repainted panels, sharp body lines, and edges need extra caution because they have less safety margin.
More aggressive correction is not automatically better. If a vehicle only needs a gloss enhancement, chasing deep defects can create unnecessary risk. A good correction strategy balances visible improvement with long-term paint preservation.
Why a test spot matters
A test spot is a small controlled area used to find the least aggressive method that achieves the desired result. It tells the detailer how the paint reacts, whether the paint is hard or soft, whether haze remains after cutting, and whether a finishing polish is needed.
Without a test spot, a detailer is guessing. With a test spot, the process can be chosen intelligently: pad, liquid, machine speed, pressure, section size, number of passes, wipe-off behavior, and final finish.
Enhancement polish, one-step correction, and multi-step correction
Stage 1 enhancement polish
An enhancement polish focuses on gloss and clarity more than heavy defect removal. It is ideal for newer vehicles, light haze, light wash marks, or customers who want the paint to look sharper without chasing every swirl.
Stage 2 one-step correction
A one-step correction uses one polishing stage to balance cut and finish. It can significantly improve swirls, haze, and light defects while still finishing well enough for a clean final presentation on many paints. Products such as 3D ONE can be useful in this kind of balanced correction when paired with the right pad and technique.
Stage 3 multi-step correction
A multi-step correction separates heavier cutting from finishing. The first stage may use a stronger compound and cutting pad to reduce deeper defects. The second stage refines haze and restores clarity. This is often needed on darker paint, softer paint that hazes easily, or vehicles needing a higher-level finish before ceramic coating.
Compound vs polish vs finishing polish
A compound is designed for more cut. It removes defects faster but may leave haze that needs refining. Meguiar’s M105 is an example of a stronger compound used when more correction is needed. A polish refines the surface and improves gloss. Meguiar’s M205 is an example of a finishing polish used to clarify and refine after heavier work or as a light correction step.
Some modern products can cut and finish depending on the pad and paint. The liquid is only one part of the result. Pad choice, machine type, pressure, paint hardness, towel wipe-off, and technique all affect the finish.
Pad types: foam, microfiber, wool, and finishing grades
Pads control how the abrasive meets the paint. Foam pads are available in cutting, polishing, finishing, and ultra-fine grades. Cutting foam offers more defect removal. Polishing foam balances cut and finish. Finishing and ultra-fine pads are used to refine gloss, especially after compounding or on soft paint.
Microfiber pads usually cut more than many foam polishing pads and can be useful for swirled or harder paint. Wool pads can cut aggressively and are often associated with heavier correction work, but they require control and are not automatically the right choice for every vehicle.
| Pad type | General role | Risk if misused |
|---|---|---|
| Cutting foam | Moderate to strong defect removal | Can haze soft paint |
| Polishing foam | Balanced correction and finish | May not cut enough on hard paint |
| Finishing foam | Gloss refinement | Will not remove deeper defects |
| Microfiber | Higher cut on many paints | Can leave haze needing refinement |
| Wool | Heavy cut in skilled hands | High risk if used carelessly |
Machine types: dual-action, forced rotation, and rotary
A dual-action polisher oscillates and rotates, making it a safer and versatile choice for many correction jobs. The MaxShine MB15 Pro dual-action polisher fits this category and is useful for enhancement, one-step correction, and controlled localized paint improvement.
Forced-rotation machines maintain driven rotation and can correct efficiently but require more control. Rotary polishers spin on one axis and can cut quickly, but they can also create holograms or heat risk if used carelessly. The machine is a tool; the process and judgment matter more than the name of the tool.
Heat, pressure, arm speed, pad rotation, and section size
Correction is controlled by pressure, machine speed, pad rotation, arm speed, section size, heat, and how many passes are made. Moving too fast may not correct. Moving too slow or using too much pressure can create heat and risk. Letting the pad stall on a dual-action machine reduces correction efficiency.
A clean pad also matters. As pads load with spent polish and removed paint residue, they cut worse, finish worse, and can create haze. Pad cleaning, pad rotation, and using enough pads for the job are part of professional correction.
Paint types: hard, soft, sticky, thin, repainted, dark, and light
Hard paint may need more aggressive pads or compounds to show meaningful improvement. Soft paint may correct quickly but haze or mar easily during wipe-off. Sticky paint can make polish removal difficult and requires patience. Thin paint or repainted panels need extra caution.
Black and dark paint show defects more easily because light distortion is more visible. Light silver or white paint can hide swirls better, but that does not mean the defects are not there. The correction strategy should be based on inspection lighting, not just how the paint looks in shade.
Why some scratches cannot be safely removed
If a scratch is too deep, removing it would require removing too much clear coat. That is not a good trade. A professional detailer may improve the appearance of deeper scratches, soften the edges, or reduce contrast, but safe correction does not mean chasing every line until the paint is compromised.
Wet sanding is a separate, higher-risk process and should not be treated as normal polishing. It may be useful in specific advanced cases, but it requires paint thickness awareness, controlled sanding marks, and proper refinement afterward.
Why polishing before ceramic coating matters
Ceramic coating adds protection and gloss, but it does not remove swirls. If coating is installed over swirled or hazy paint, the coating protects that appearance. That is why decontamination and correction are often recommended before true ceramic coating. The better the paint is prepared, the better the final coated finish looks.
A coating prep process usually includes washing, iron removal, clay or mechanical decontamination if needed, polishing, panel wipe, and then coating installation. The polishing step is what refines the paint before it is sealed under long-term protection.
Paint correction process step-by-step
- Wash the vehicle thoroughly to remove loose dirt.
- Chemically decontaminate iron fallout and tar where needed.
- Mechanically decontaminate with clay only when needed and with proper lubrication.
- Dry and inspect under strong lighting.
- Mask sensitive trim, edges, badges, or high-risk areas.
- Perform a test spot to choose pad, compound, polish, speed, and pressure.
- Compound or correct the paint as needed.
- Refine with polish if haze remains or higher gloss is required.
- Wipe panels properly to remove polishing oils before protection.
- Apply wax, sealant, or ceramic coating depending on the package and goal.
Common paint correction mistakes
- Using the most aggressive combo first instead of testing.
- Polishing dirty or contaminated paint.
- Ignoring trim, edges, and thin areas.
- Using too few pads and letting pads clog.
- Chasing defects that are too deep.
- Skipping refinement after heavy cutting.
- Installing ceramic coating over swirls and expecting the coating to hide them.
- Promising perfect correction on paint that does not safely allow it.
When paint correction is worth it
Paint correction is worth it when the vehicle has visible swirls, haze, dullness, oxidation, wash marks, or paint that lacks clarity. It is especially valuable before ceramic coating, resale preparation, premium ownership refreshes, dark paint restoration, and enthusiast vehicles where gloss and reflection matter.
It may not be the right answer for failed clear coat, severe rock chips, peeling paint, deep scratches through clear, or customers who only need a basic clean. In those cases, correction may improve selected areas, but repair, repainting, touch-up, or expectation management may be more honest.
Final paint correction checklist
- Inspect under proper lighting.
- Decontaminate before polishing.
- Start with a test spot.
- Use the least aggressive effective method.
- Match pad and liquid to the paint.
- Control heat, pressure, arm speed, and pad rotation.
- Refine after cutting when needed.
- Protect the paint after correction.
- Avoid guaranteed scratch-removal promises.